Cloud Buckets
This workflow allows you to ingest data from an AWS or GCP bucket for which you have credentials.
Creating the workflow
This workflow supports multiple different cloud providers.
- AWS S3
- GCP GS
This workflow allows you to ingest images from the AWS Simple Storage Service (S3) into ApertureDB. This lets you use your own existing data. This provides an easy way to get started with ApertureDB, and to see how it can be used with real data.
![[object Object]](/assets/images/configure_ingest_from_s3-18ac626532f43ac2bb47fe083abe0313.png)
- Enter the AWS S3 bucket name. You may be able to list your S3 buckets using aws s3 ls or by using the AWS S3 Console.
- Enter the AWS access key. See AWS documentation for details on how to generate these keys or the Getting Credentials section on this page. It is important that the credentials have the appropriate permissions to access the bucket; see the Setting Permissions section on this page. For your own security, you may wish to generate new keys for this purpose.
- Enter the AWS secret access key; this is a password field.
- Decide whether you want to process images, videos, or PDFs. You can choose as many as you want, but you should select at least one.
- Click the blue button at the bottom.
This workflow allows you to ingest images from Google Cloud Storage (GS) into ApertureDB. This lets you use your own existing data. This provides an easy way to get started with ApertureDB, and to see how it can be used with real data.
![[object Object]](/assets/images/configure_ingest_from_gs-681692634d307761eca4ceda20a2e329.png)
- Enter the GCP GS (Google Cloud Storage) bucket name. You may be able to list your buckets using gsutil ls or via the Google Cloud Storage Console.
- Enter the GCP service account key JSON. See Google Cloud documentation or the Getting Credentials section on this page for details on creating and downloading service account keys. It is important that the credentials have the appropriate permissions to access the bucket; see the Setting Permissions section on this page. For security, consider creating a key with limited permissions and deleting it when no longer needed.
- Decide whether you want to process images, videos, or PDFs. You can choose as many as you want, but you should select at least one.
- Click the blue button at the bottom.
See the results
Results will start being available in your database as soon as your bucket status is 'Started'.
To view data you have ingested, go to the Web UI for your instance.
Getting Credentials
If you need help getting the proper credentials for your bucket, the following are some hints which can help for users with standard configurations
- AWS S3
- GCP GS
From the console, first type in 'IAM' to the search box in the top:
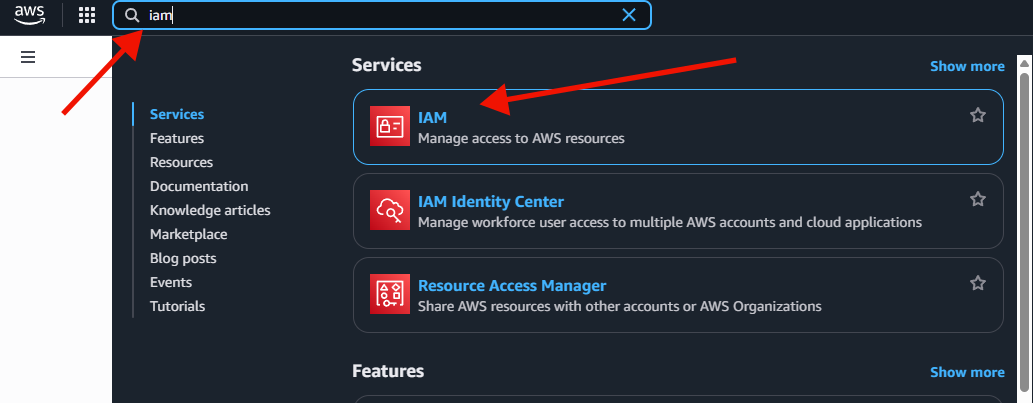
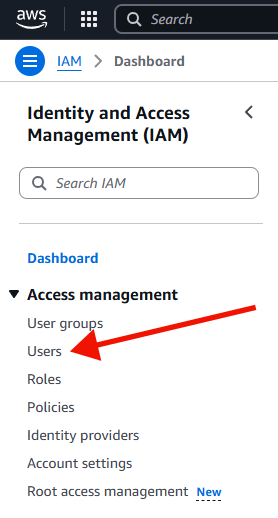
Select 'IAM', and find 'Users' in the menu on the left.
Once you select 'Users', find the user that you will use to access the data. Use search if you have many users. Click on the link in the 'User name' column.

Once you are in the page for the user, click on the tab on the right content side that says 'Security Credentials'

Now scroll down in the right content side until you see a section labled 'Access keys'. Choose 'Create Access Key'.

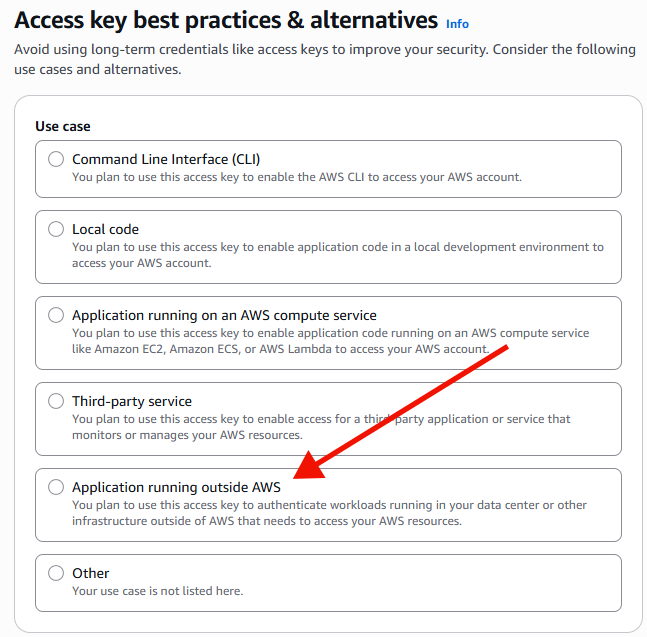
Now, choose 'Application Running Outside AWS' and click on 'next'
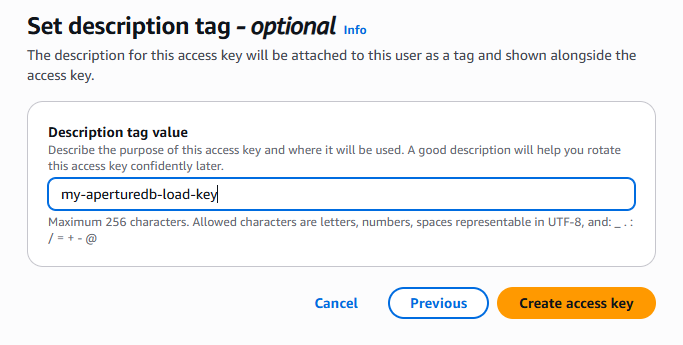
Choose a name that will mean something to you, and click 'Create access key'
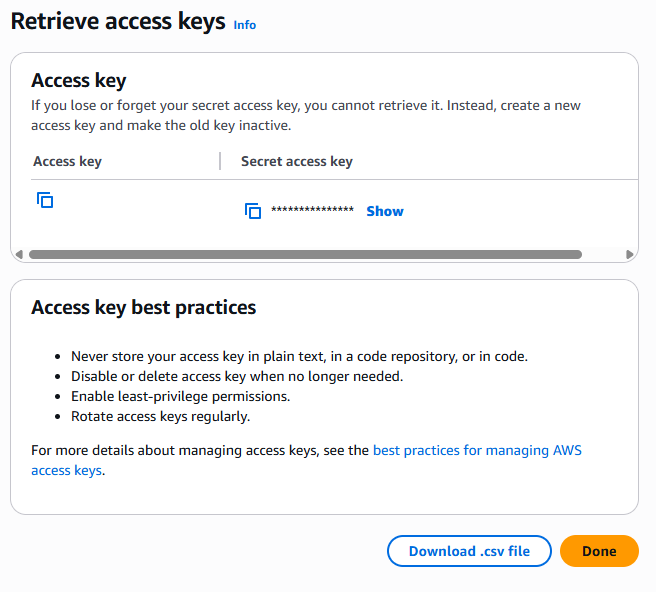
Now retrieve the information to your access key, either by selecting the copy for the access key and secret key, or by downloading a csv.
Once you no longer need your key, delete it.

First, log into your google cloud console.
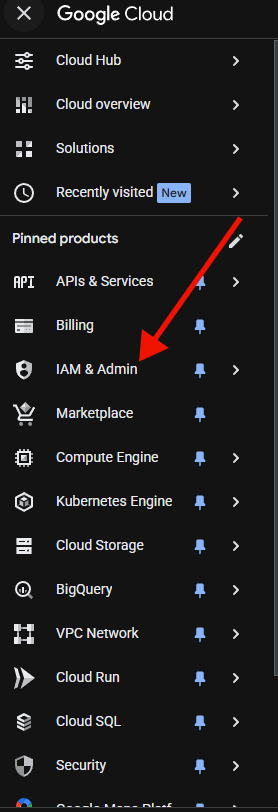
Select "IAM" from the hamburger menu.
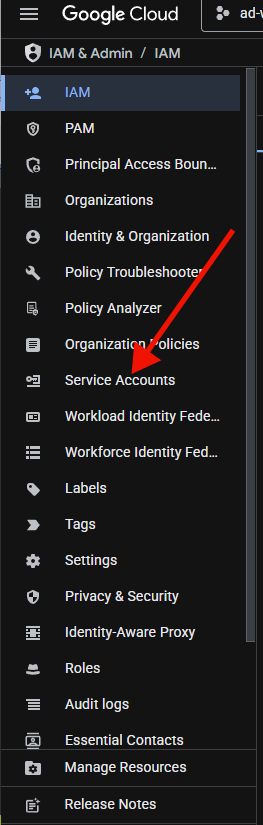
Next, select "Service accounts" from the menu on the left.
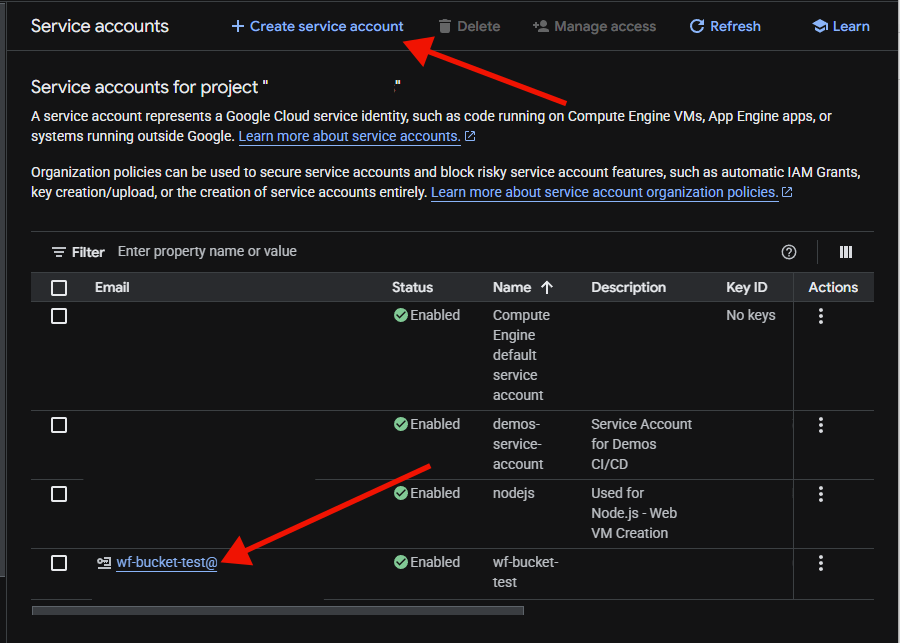
Once at the service accounts, if you need to create an account, choose 'Create Service Account' and choose a name.
From this page you select your account by clicking on the name.
Select the 'keys' tab.
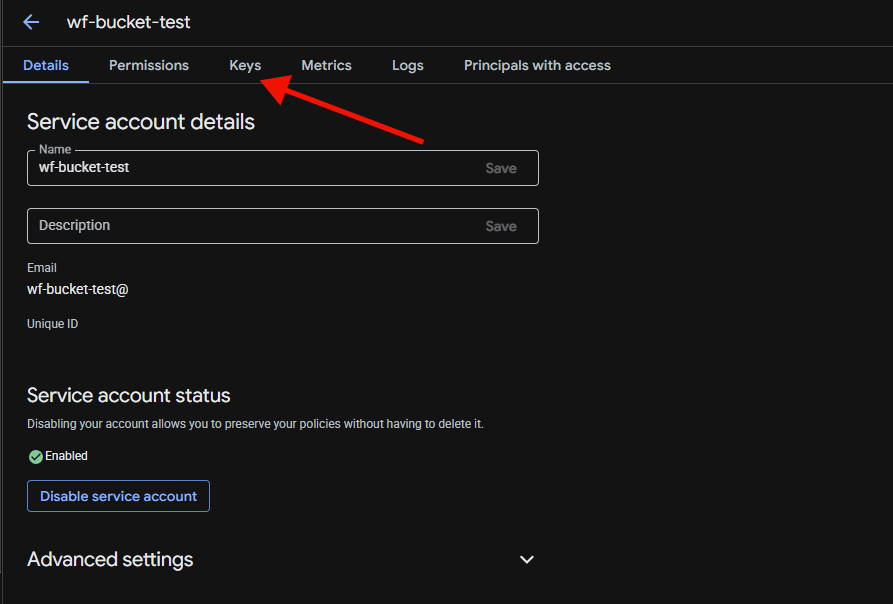
From the keys tab, select 'Add Key'.
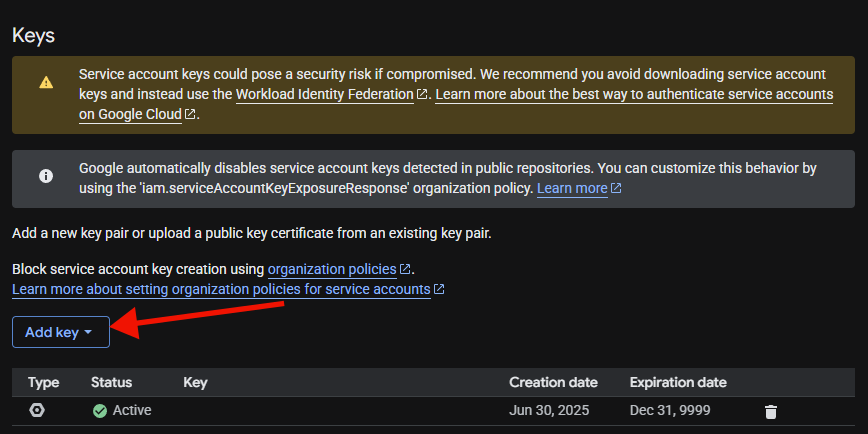
This will launch a popup. The default type should be 'json', which is what we require here. Click on Create.
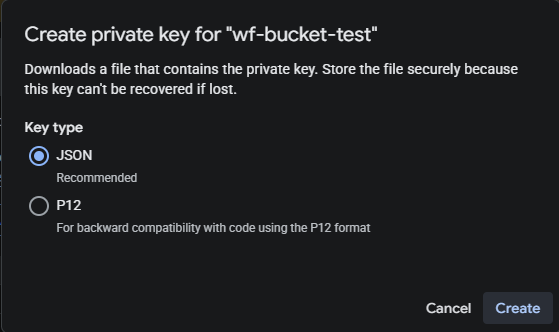
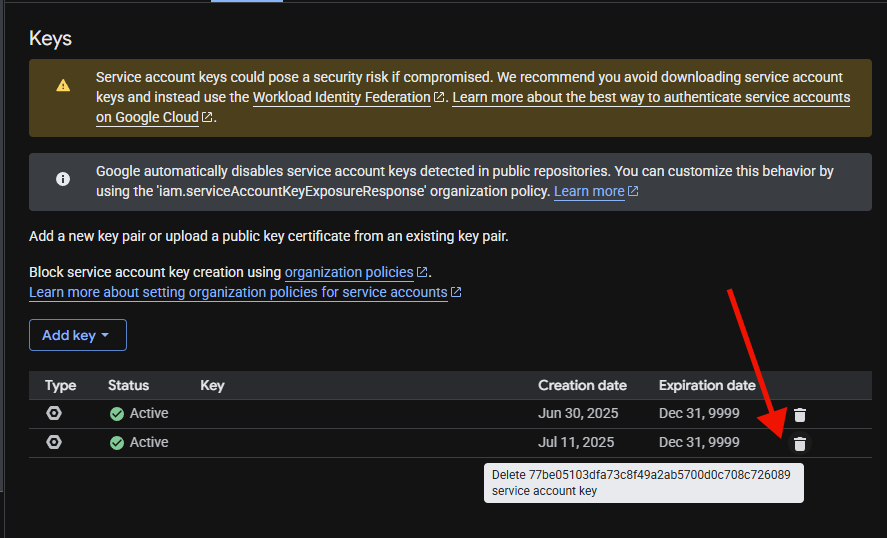
It will display a file download dialog. Save the file, then open in any file editor, and that is the key to copy into the configuration. When finished with the key, you should delete it by pressing the trashcan in the keys menu for the service account.
Setting Permissions
Permission management is critical for allowing access to your data, and we strive to use minimal permissions for our workflows.
- AWS S3
- GCP GS
Giving a user ReadOnlyAccess is a simple way to provide adequate access.
The minimal access required follows:
{
	"Version": "2012-10-17",
	"Statement": [
		{
			"Effect": "Allow",
			"Action": [
				"s3:GetObject",
				"s3:ListBucket"
			],
			"Resource": [
				"arn:aws:s3:::YOUR_BUCKET_NAME",
				"arn:aws:s3:::YOUR_BUCKET_NAME/*"
			]
		},
		{
			"Effect": "Allow",
			"Action": [
				"s3:ListAllMyBuckets"
			],
			"Resource": "*"
		}
	]
}
ListAllMyBuckets is used to verify that the account credentials have been
supplied correctly and to aid in detecting misconfiguration of bucket names or
permissions.
Giving your service account the 'Viewer' role is an easy way to specify limited, but sufficent permissions.
The minimal permissions are
storage.buckets.get
storage.objects.get
storage.objects.list
the objects permissions can be restricted to just the bucket by adding an IAM condition containing the permissions to the role.
By setting the condition to resource.name.startsWith('projects/_/YOUR_BUCKET_NAME') you can
limit reads to only the target bucket.